Carbon
Stable color, low mirror effect and well suited to set-ups that need balanced performance.
The windshield, front windows and rear window each need a different light level. Compare the technologies, choose by position and see the install process.
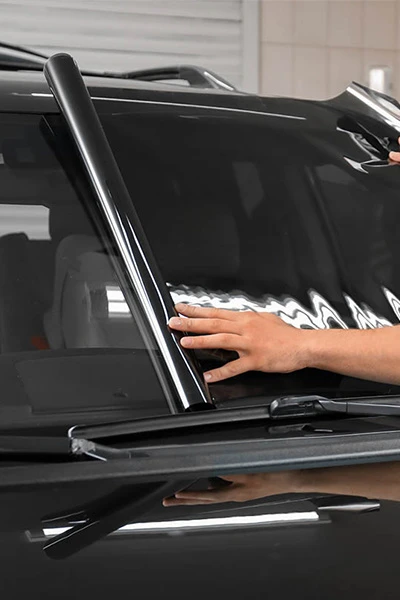
Solution 01 · Automotive Window Film
Automotive film is not just “light or dark”. The right set-up balances visible light transmission, heat management, glare, privacy, glass color and visibility in low light. VEGO’s records describe a range running from 1-layer and 2-layer films through Carbon and Nano Ceramic Ultra HD to multi-layer sputtered film.
Construction & technology
Stable color, low mirror effect and well suited to set-ups that need balanced performance.
Nano-sized ceramic particles manage heat while keeping GPS, phone and ETC signals flowing.
A metal layer or sputtered structure reflects part of the sun’s energy; weigh the mirror effect and any transmitting and receiving devices in the car.
Multiple thin functional layers work together to optimize optics, color and performance rather than relying on one thick layer.
This product group emphasizes sharpness and visibility; you should still view a real sample on the correct type of car glass.
A way of describing product structure in the older catalog; the final choice must be based on the film code and the current specification sheet.
Designed around the cabin
Choose high visible light transmission, good clarity and just enough glare reduction. Total transmission must be measured once the film is combined with the original glass.
You need a clear view of the mirrors while cutting the heat from both sides. Judge the darkness level by day and by night.
Lower visible light transmission can be used, but you must still keep visibility when reversing and avoid unbalancing the color of the whole cabin.
Set the light transmission for the windshield, side and rear windows and see the cabin from inside and outside.
This simulator needs JavaScript. See the code tables on each product series page.
Factory glass is already tinted. Enter the glass and film transmission to estimate the result once fitted.
Total transmission = glass × film ÷ 100. For example, 80% glass with 35% film gives about 28%.
Everyday value
Less solar energy passes through the glass, helping the air conditioning bring the cabin to the desired temperature faster.
Eases eye strain from low-angle sun or oncoming headlights; it does not replace the requirement for safe visibility.
Helps reduce UV exposure for occupants and the interior, according to the specifications of each film code.
Privacy varies with visible light transmission and the difference in light inside and outside the car; a darker film does not mean better heat insulation.
Non-metal lines suit cars that use GPS, phones, ETC and other transmitting and receiving devices in the cabin.
The film and adhesive can hold some of the fragments when glass breaks; this is not bulletproof glass or an impact-protection solution.
Recommended process
Check the glass type, any old film, cameras/sensors and how the car is really used.
Compare film samples on the windshield, front side windows and rear seat windows rather than choosing by darkness alone.
Measure the glass as it stands, clean the surface and control dust in the installation area.
Shape the film to the curve of the glass and protect interior parts.
Align the film, squeegee out the solution, finish the edges and inspect under light from several angles.
Link the correct SKU, license plate and customer details so the term on the card matches the database.
FAQ
No. Darkness mainly relates to visible light transmission; heat management depends on the film’s material and structure.
Original glass has its own color and light transmission. The value after installation is the combined result of glass and film.
Nano Ceramic and Carbon lines without a metal layer are usually kinder to signals. Check the exact film code if the car has specialized devices.
The waiting time depends on installation conditions and the weather. Follow the specific instructions from the dealer who hands over the car.
The VEGO team can advise you on film lines, dealer terms and technical support.
Call 0924 802 802Send a request